 Success! The stone is set. I used a grey wheel in the flexshaft to smooth out the marks left by the hammer and steel pusher. All that is left to do is the bright cut. I will use a graver to clean up the metal where it meets the stone, essentially cutting away any jagged bits that the hammering caused. Then it's on to the finishing touches. I am 100% sold on using some small diamonds to pave set on the sides of the ring, but I am about 50/50 on the hand engraving element that I was thinking of. I am not sure if it needs it. I think I will set the stones first and see how it looks. Next week I will do the big reveal of the finished ring and also post a sketch of the next project. Very exciting!
Friday, July 30, 2010
stone setting success!
Success! The stone is set. I used a grey wheel in the flexshaft to smooth out the marks left by the hammer and steel pusher. All that is left to do is the bright cut. I will use a graver to clean up the metal where it meets the stone, essentially cutting away any jagged bits that the hammering caused. Then it's on to the finishing touches. I am 100% sold on using some small diamonds to pave set on the sides of the ring, but I am about 50/50 on the hand engraving element that I was thinking of. I am not sure if it needs it. I think I will set the stones first and see how it looks. Next week I will do the big reveal of the finished ring and also post a sketch of the next project. Very exciting!
Thursday, July 29, 2010
Setting the Aquamarine
We are down to the nerve wracking part of the project, make or break... as it were.
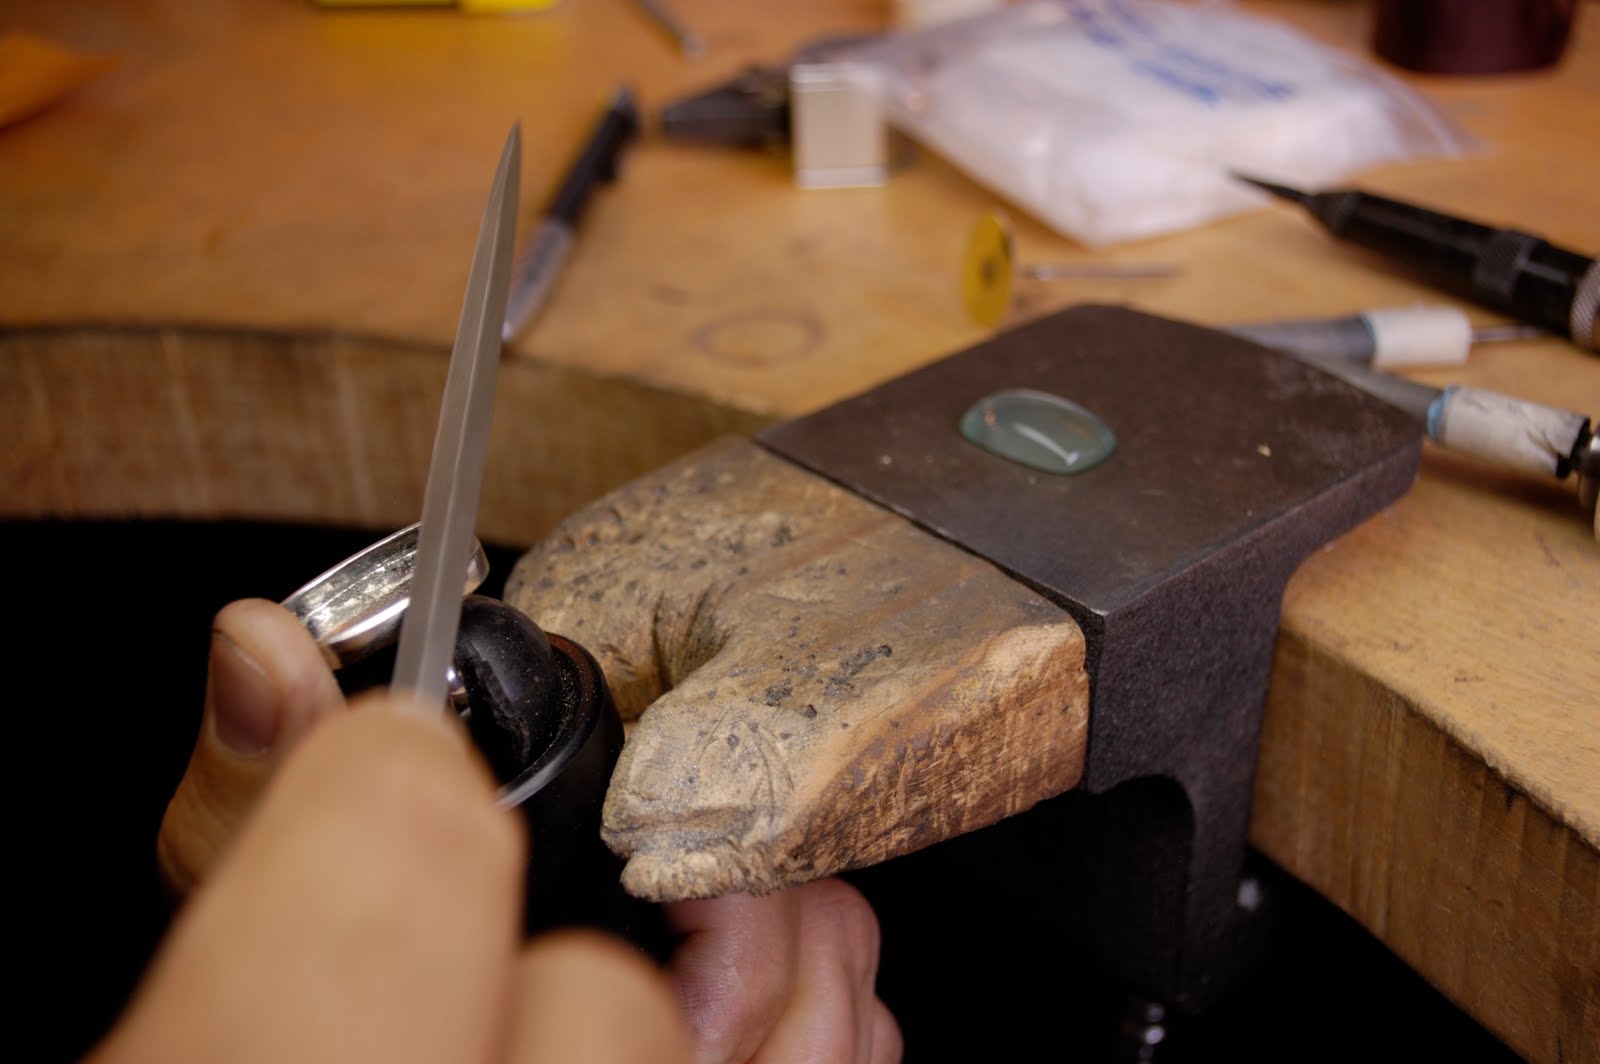
Stone setting is fairly straightforward. You create a "seat" for the stone and then you push, burnish or hammer metal down to cover the very edge of the stone and catch it in place. The trick is not to chip, scratch or shatter the stone when hammering on it. Aquamarine is a fairly tough stone and can take a fair bit of the force required to bezel set a cabochon. Here I am filing the edge of the bezel to make it easier to push over the stone.
Stone setting is fairly straightforward. You create a "seat" for the stone and then you push, burnish or hammer metal down to cover the very edge of the stone and catch it in place. The trick is not to chip, scratch or shatter the stone when hammering on it. Aquamarine is a fairly tough stone and can take a fair bit of the force required to bezel set a cabochon. Here I am filing the edge of the bezel to make it easier to push over the stone.

I like my bezels to look really thick. This means that there is a lot of metal to move so the edge needs to be cut on an angle to help in the pushing. This is called a "chamfer" facet. I use my flexshaft and a cylinder burr to remove metal quickly.
 I use a ball burr to remove the last bit of material at the edge.
I then put the stone in the seat and tack it with a dot of crazy glue to prevent it from jumping around when I am hammering on it, that's one sure way to crack a stone.

I use a pistol grip chasing hammer and a steel pusher to hammer the metal down onto the edge of the stone. Almost finished...
Friday, July 23, 2010
ready to set!!!
 So here we are! We've come a long way. Sketches, prototype, casting, grinding/filing, sanding, buffing... and the hard part hasn't even started yet. I plan to set the aquamarine this week. I will take pictures of the process. I will put the final design touches on it the following week and hopefully be ready for a big reveal!!!
Aquamarine progress
 The ring is starting to take shape! I have been using files and grey wheels to get to this point and I like it so far.
I wrap emery paper around a slit mandrel and use that to smooth out the file marks and get the ring ready to polish. We go through three levels of grit 240 - 400 - 600 getting ready for tripoli 2500 grit and then the rouge or high polish is actually about a 5000 grit, scratches so small they look polished.

Finally I use my buffing machine to put on the final polish
Grinding the rough casting
 Here is the rough casting with the gates still on (the gate, or button, is the nub that remains after the sprue is cut off... what's a sprue? It's the tube where the metal flowed into the ring)
 I use a file to remove the light grey crust that forms on the casting when it cools. I also use it to shape the ring and true up the overall form.
  My flexible shaft, or flexshaft is the best tool a goldsmith has. You can put different grinding and sanding tools in it to smooth the surface of the ring before polishing. This one is a silica based abrasive called a grey wheel.
Back from casting
 I have been working on the ring a bit here and there this week. This time of year my weeks are filled with client meetings and working on wedding bands. The pace has actually been great as it has allowed me time to change my mind about the design 4-5 times! I know that sounds crazy, but making design decisions for me is a process of making a decision, seeing how it feels for a day or two and then re-addressing it with fresh perspective. My latest decision is the final one... I think. In the end I have decided to do a bit of hand engraving and to use some diamonds. One of my favorite things about rings is that there is a lot of room to add details in interesting places that requires the removal and closer inspection of the ring to get the full effect. I think we will achieve that here. I have been taking pictures of the grinding and polishing process and I will post those in a bit.
Friday, July 16, 2010
Casting the Aquamarine ring
 Here is the raw 18k ultra white gold weighed out and ready to be melted.
 The wax is put in a flask and then a silica based plaster is poured into it that then hardens. The flask is put into the kiln to let the wax melt away leaving a perfect void of whatever you carved.
 The 18k pieces are put into the crucible and a large torch is used to heat the metal.
 It takes a couple of minutes but eventually the gold starts to melt together
 When the metal is completely liquid the flask is placed in the centrifuge
 The centrifuge is spring loaded and counter balanced so it can spin really fast and shoot the molten 18k into the void left by the wax in the silica
 Once the centrifuge stops spinning the flask is quenched in water to remove the plaster and release the tree of rings
 The finished casting is ready to be cut off and weighed for delivery. Thanks Bob for the amazing casting and Traven for the great pictures!
Thursday, July 15, 2010
Aquamarine U-turn
 The prototype is finished... well to a point. This is what I love about creating, the materials tell a story. This stone doesn't want baguette diamonds or hand engraving. It needs something softer, sleeker, more modern. I have left the wax big and blocky so that I can create the look I want in the metal (and to be a little bit mysterious, I'll admit). It costs a little more to do it this way, as it increases the initial weight of the casting, but the opportunity to work through the design in metal is worth it as I can take a bit more time with it. Time to really let the idea develop. Intrigued yet? I am using lost wax casting to turn the wax into 18k ultra white gold. I outsource this work at a casting house. The ring is there today. The owner of the casting house has been nice enough to let my brother Traven take some photos of the casting process tomorrow morning so that you can get a good sense of the whole process.
Friday, July 9, 2010
Aquamarine prototype Step #2
 The ring is starting to take shape. Marking a grid on the block of wax allows the use of aggressive burrs, like the one in the picture to remove wax efficiently. Once we have the bulk of the extra wax removed we can move on to finer files and burrs to refine the shape and start cutting the channel for the diamonds! Then it's off to casting to be made into metal...
Aquamarine prototype Step #1
 Wedding band season is in full swing so I didn't get as far as I hoped on the prototype, so this is an "in progress" shot.
 Thank you for the feedback, it was very helpful. I have decided to go with the channel set baguette diamond design. I agree that the clean, simple lines show off the Aquamarine the best.
The prototype is carved out of special type of wax that comes in tube and block form. The process is subtractive, where you start with a block and remove material until you have what you want.
I'll keep carving... more to come.
Friday, July 2, 2010
Aquamarine design #2
 This is going to be a hard choice! I really like the look of the hand engraved, Art Deco style leaves. I added a millgrain edge around the bezel to give it a tactile quality and a bit of old school charm. The other factor that always plays in is cost. The goal is to have someone buy and love the ring. Is the design with the diamonds worth an extra $600 in material cost? It's always hard for me to make the final choice... so many options and factors to think about. I think I'll take the weekend and let it percolate. Next week we will be prototyping the ring in wax. I will post some "in progress" shots of the ring being carved and then the finished wax.
Thursday, July 1, 2010
Aquamarine design #1
 I have been going back and forth with how to approach the design for this Aquamarine. Cabochons have a very soft, organic feel to them and part of me wants to play that up with a rounded band and some beautiful hand engraved leaves.
 This one with its softened rectangular shape feels like it could use a more modern design to help show off the unique shape of the stone. It would also create a nice dynamic between the rounded shape of the stone and the crispness of the band edge and the channel set diamonds. I think I need to sketch up the more organic hand engraved version to see where it takes me...
Subscribe to:
Comments (Atom)

