Friday, December 10, 2010

Garnet Deco ring finished!

Well here it is!
After weeks of working on it the Garnet Art Deco ring is finished and in the case ready for the right person to come along and fall in love with it. Going with a Garnet is not typical of the era... but I think it's ok to bend the rules a bit when you are doing an interpretation.
I know these photos are very similar but they each show a slightly different angle and there is so much going on in this ring that I decided to use them both. It's the kind of piece that needs to be held and looked at for a couple of minutes to really appreciate the detail. I had a guy stop by the studio yesterday and ask "Is that the garnet ring from the blog?" My little ring is a celebrity!

Tuesday, November 30, 2010

Garnet Deco ring almost finished!

The stones are set! The colour of this garnet is so deep and rich. I have been developing the hand engraving for it and I have settled on a couple of architectural elements that I think will really give the ring a unique Deco perspective.... I'll give you a hint! It will be inspired by a New York landmark.

Friday, November 19, 2010

garnet deco progress

The fall rush is mostly delivered and the Christmas orders are starting to come in but not crazy yet so that left a little time to work on the garnet ring. I cast it and cleaned it up. This is an in progress shot. I need to set the stones and do a bit of hand engraving but I am pleased with the results so far. I want the hand engraving to be a strong element but not take over. I have a couple of ideas that I am developing... I'll post a sketch or two soon.

Friday, November 5, 2010

Custom projects

It's been a couple of weeks since my last post. The studio is positively buzzing these days with orders. Love is in the air, lots of engagement rings... I sometimes catch myself humming the love boat theme... "Love, exciting and new, come aboard, we're expecting you... " I wonder what it says about me, my three favorite shows when I was young were Love boat, Simon and Simon, and Magnum P.I. Is it a coincidence that they all had great theme songs? Hmmm a little off topic here... or are we?

I decided to include a couple of pictures of recent projects, since the custom work has forced me to put the garnet art deco ring on hold for a couple of weeks. The top ring is a beautiful 4.80 ct cushion cut Ceylon sapphire with channel set princess cut diamonds. The second ring is a channel set Ruby baguette eternity ring... very Marilyn Monroe... The early part of November usually brings more engagement rings and wedding bands and then we will slowly start to segue into the Christmas season, only seven weeks left!

Thursday, September 30, 2010

Garnet deco prototype

The last couple of weeks have been busy with new orders at the studio. The fall brings crisp weather, Steelers football and engagement rings... sshhh, you might be getting one!
I also completed a personal milestone this weekend I spent the summer training for my first marathon that I ran and completed on Sunday in 4:49.
My list of addictions reads
1 - Steelers football
2 - Pie (there isn't a bad kind so take your pick!)
3 - Distance running
I guess it could be worse.


In this weeks post I am starting the prototype for the Garnet Art Deco ring. The first step is to cut a block of wax to the right width for the ring. I then open out the finger hole to the right size. I use dividers and my vernier gauge to mark out the settings for the stones.
I then keep removing material until the outline of the ring starts to take shape. Next week we will open up the setting, clean up the wax and then send it off to casting.

Friday, September 17, 2010

Tourmaline

I want to take a bit of time this week to talk about one of my greatest sources of inspiration - precious gems. While I like all gems, Tourmaline and sapphires are top of my list.
In this post I will focus on Tourmalines.
As a designer I am always looking for gems with vibrant colours, that have been expertly cut and faceted. They are like sparkly gumdrops of colour to me and I find them irresistible. When working with a gem, my goal is to design a piece of jewellery that will showcase the stone and take advantage of it's natural beauty.

Tourmaline has one of the largest range of colour of any gem. They can be found in many shades of blue, green, pink, red, orange, yellow, brown. They can be found in many parts of the world with the largest deposits in Brazil, Sri Lanka, Nigeria, Tanzania, and Madagascar.
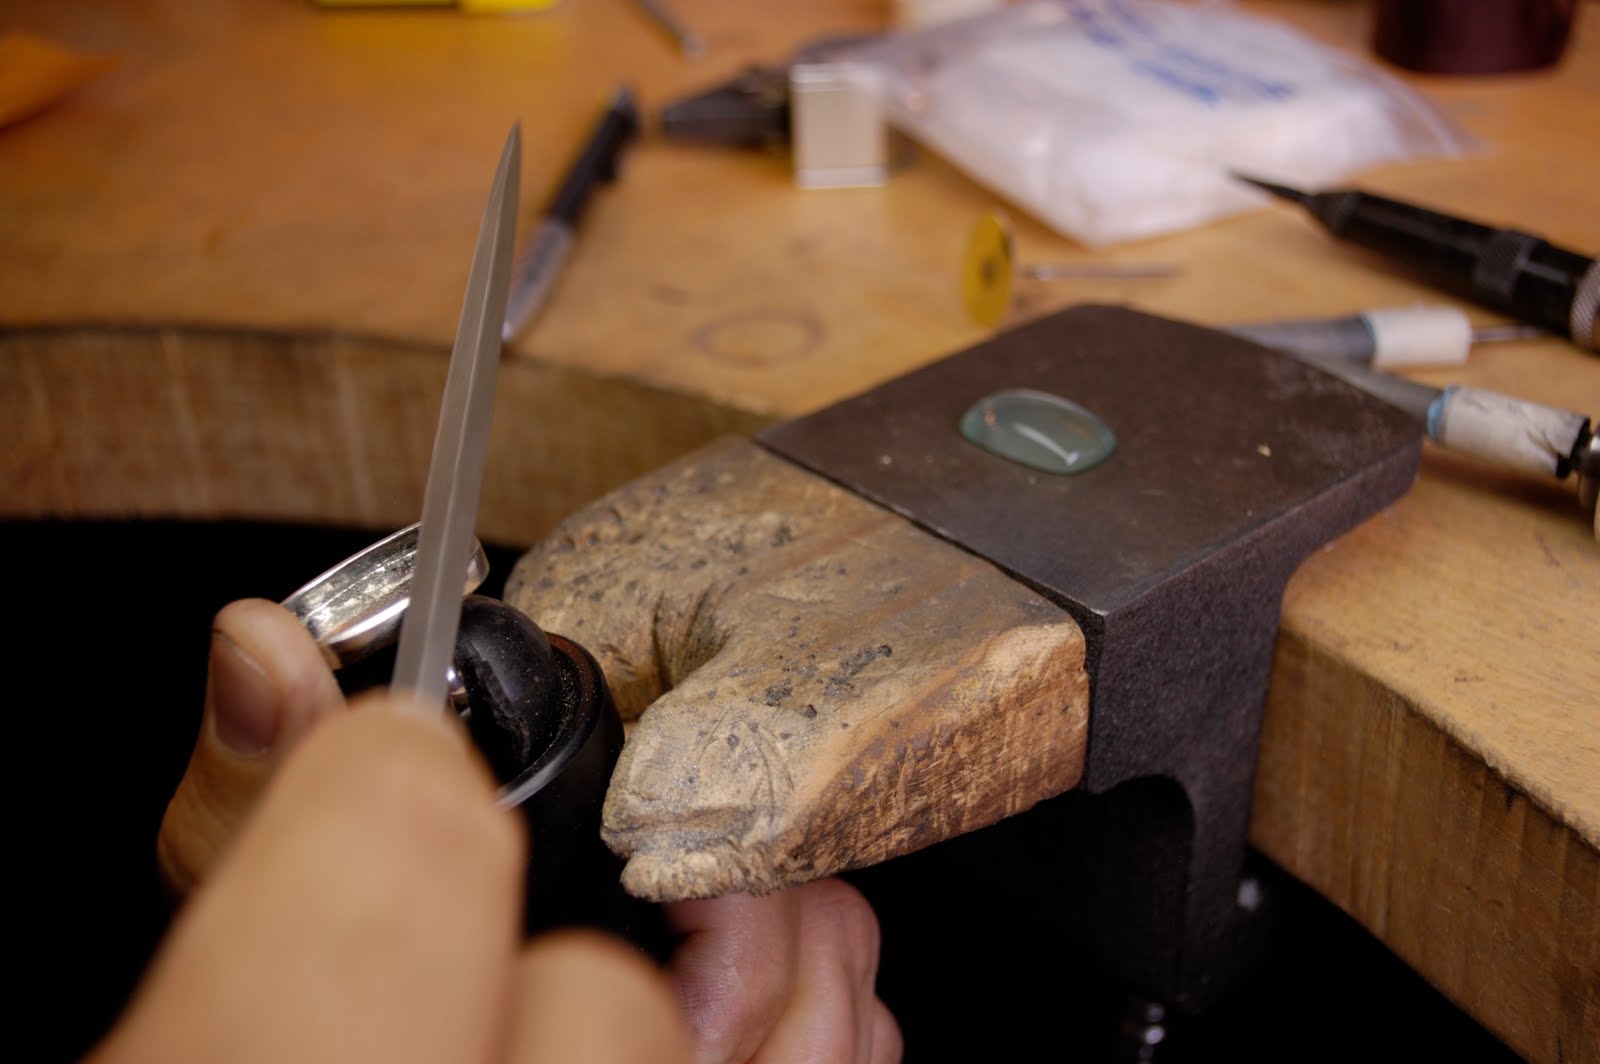
Tourmalines are highly wearable as they are tough, meaning they aren't easy to chip, and they have a hardness of 7.5 on the Mohs scale. This helps them resist sratches. Tourmalines beautiful colour, high luster and wearability make it an ideal stone to use in jewellery. Tourmaline crystals can be faceted, or cut into a cabochon, like the blue tourmaline in the ring above.
Tourmalines can sometimes show Dichroism. Depending on the angle of viewing, a stone can show different shades or intensities of colour at the same time. This makes them very interesting to look at when you rotate the stone.
This one has an icy pink tone to it, I surrounded it with pave set diamonds for a bit of sparkle.
If you are ever in Brazil or Madagascar... or my studio... keep an eye out for tourmaline and it's beautiful range of colour.
Next week I will continue on with the Art Deco Garnet ring.

Friday, September 10, 2010

Finishing the texture pendant

There aren't that many steps left to finish the piece, but they are the critical ones. I like bails to be simple so I am soldering on a couple of half loops to thread the chain through. They are going to be hidden at the back so I want them as low profile as possible. I heat the pendant from the back first so that I don't melt my loop before the pendant gets to temperature.
When the tempreature is right, I switch the flame to the front and put the loop in place until the solder flows. I repeat with a second loop and the bail is complete.
Next I need to set the diamonds. I start by laying out the pattern with a marker.
I use a ball burr to create a divot that will guide the drill bit and prevent it from wandering from the spot where I want the hole.
I carefully drill the holes. I use a 1 mm drill bit. They can be a little fragile so I take care not to break one off and get it lodged in the hole where the diamond is supposed to go... I am setting the diamonds off camera, I can't give away all my secrets now can I?
Here is the finished pendant. Modern, organic, playful, funky. Success!!!
Next week we start the prototype for the garnet ring. I am looking forward to creating some Art Deco awesomeness!

Friday, September 3, 2010

Texture pendant almost complete

Last week we finished by annealing the metal to soften it and get it ready for the next round of hammering. This week I did one round of hammering to round out the shape a bit more and then here I start using the back of my riveting hammer that I have ground to a long sharp edge to give me the long hammer texture that I am looking for.

I am going to have to hit the pendant several hundred times to get the texture even. Sounds like fun to me! I slowly turn the pendant as I hit to give the hammering a radiating pattern.
For added interest I am adding some longer sawed lines to stand in contrast to the shorter deeper lines created by the hammer. Sawing is also way more accurate so I can fill in any spots that the hammer missed.
I do a light emery clean up to remove any burrs or spitches left from the hammering and to get the metal ready for polishing
Three levels of polishing compound and the metal starts to look nice and sparkly!
I love texture!!! It's like candy for the eyes. It makes you want to pick the piece up and investigate it. As a maker I am always looking for things that will engage my potential clients. Once we add the diamonds we will have texture and sparkle... a deadly combination. Next week I might advise you to look away, or feel a gravitational pull like compulsion to buy this piece...
O.k. Kidding aside. We are almost finished. Next week I will solder on the little loops that will act as the bail and hold the chain. I will also set the diamonds and do the final polish. Then it's the big reveal!

Thursday, August 26, 2010

Wedding bands and a new project

This week has been full of client meetings, new business and wedding band orders so I haven't had as much time for our pendant project as I would have liked. So I thought I would post a couple of really cool marriage of metal wedding bands that I have made in the last little bit. One of my specialities is making rings out of different colours of gold, particularly white and red gold. The colour contrast between the two metals, and the warm earthy tone that the copper lends to the red gold make the combination really special. This one is prototyped in four pieces, cast separately, ground and pre-polished for a perfect solder seam and then fused together under high heat.

This custom ring came out of taking elements from two different rings the client was considering and combining his favorite parts of them to make a new design. I think it turned out amazing. Great texture, and colour combination make this a very unique mens wedding band.

Lastly, I wanted to give you a sneak peek to my next project, I knew exactly what I wanted to make for this stone the moment I saw it. It's a beautiful 2.35ct  Spessertite Garnet from Madagascar. No wavering this time. Clean and modern with baguette diamonds, with maybe a small hint of Art Deco flare. I'll keep working on the pendant next week and start the Garnet prototype as well!

Friday, August 20, 2010

18k pendant with diamonds

Now we are on to the fun part. There is something very old school about shaping metal with a hammer. My great, great grandfather was a blacksmith. In my imagination I can see him in his workshop, leather apron on, covered in black from the coal fire, hot forging a big piece of steel into a sword for a nobleman... His reality was much less glamourous I'm sure, he probably made tools and horseshoes for local farmers as his main trade, I wonder if he ever made a sword?...
Ahem, back to the business at hand. Precious metal is cold forged. At the end of the last post I annealed the disc and relaxed the molecules, making the metal nice and soft to work with. I am using a vise to hold a ball punch. The ball punch supports the metal disc as I hammer on it and helps to bend the metal into a soft curve. I start on the outside and work my way towards the center of the disc hammering clockwise in a circle.

Being careful not to hammer my thumb, I slowly work my way toward the center.

Getting closer...

The disc is starting to take on a nice soft domed look, I will need to do a second round of hammering to give it the hight that I need.

The last step is called upsetting the edge, this thickens the metal at the edge of the piece and helps prevent cracking.

The metal is now work hardened. The metal structure is compressed and stiff, and any further manipulation would result in cracking. So we anneal again to soften it up and get the metal ready for the next round of hammering...
Next week we complete the dome and put on the texture!

Thursday, August 12, 2010

18k pendant with diamonds

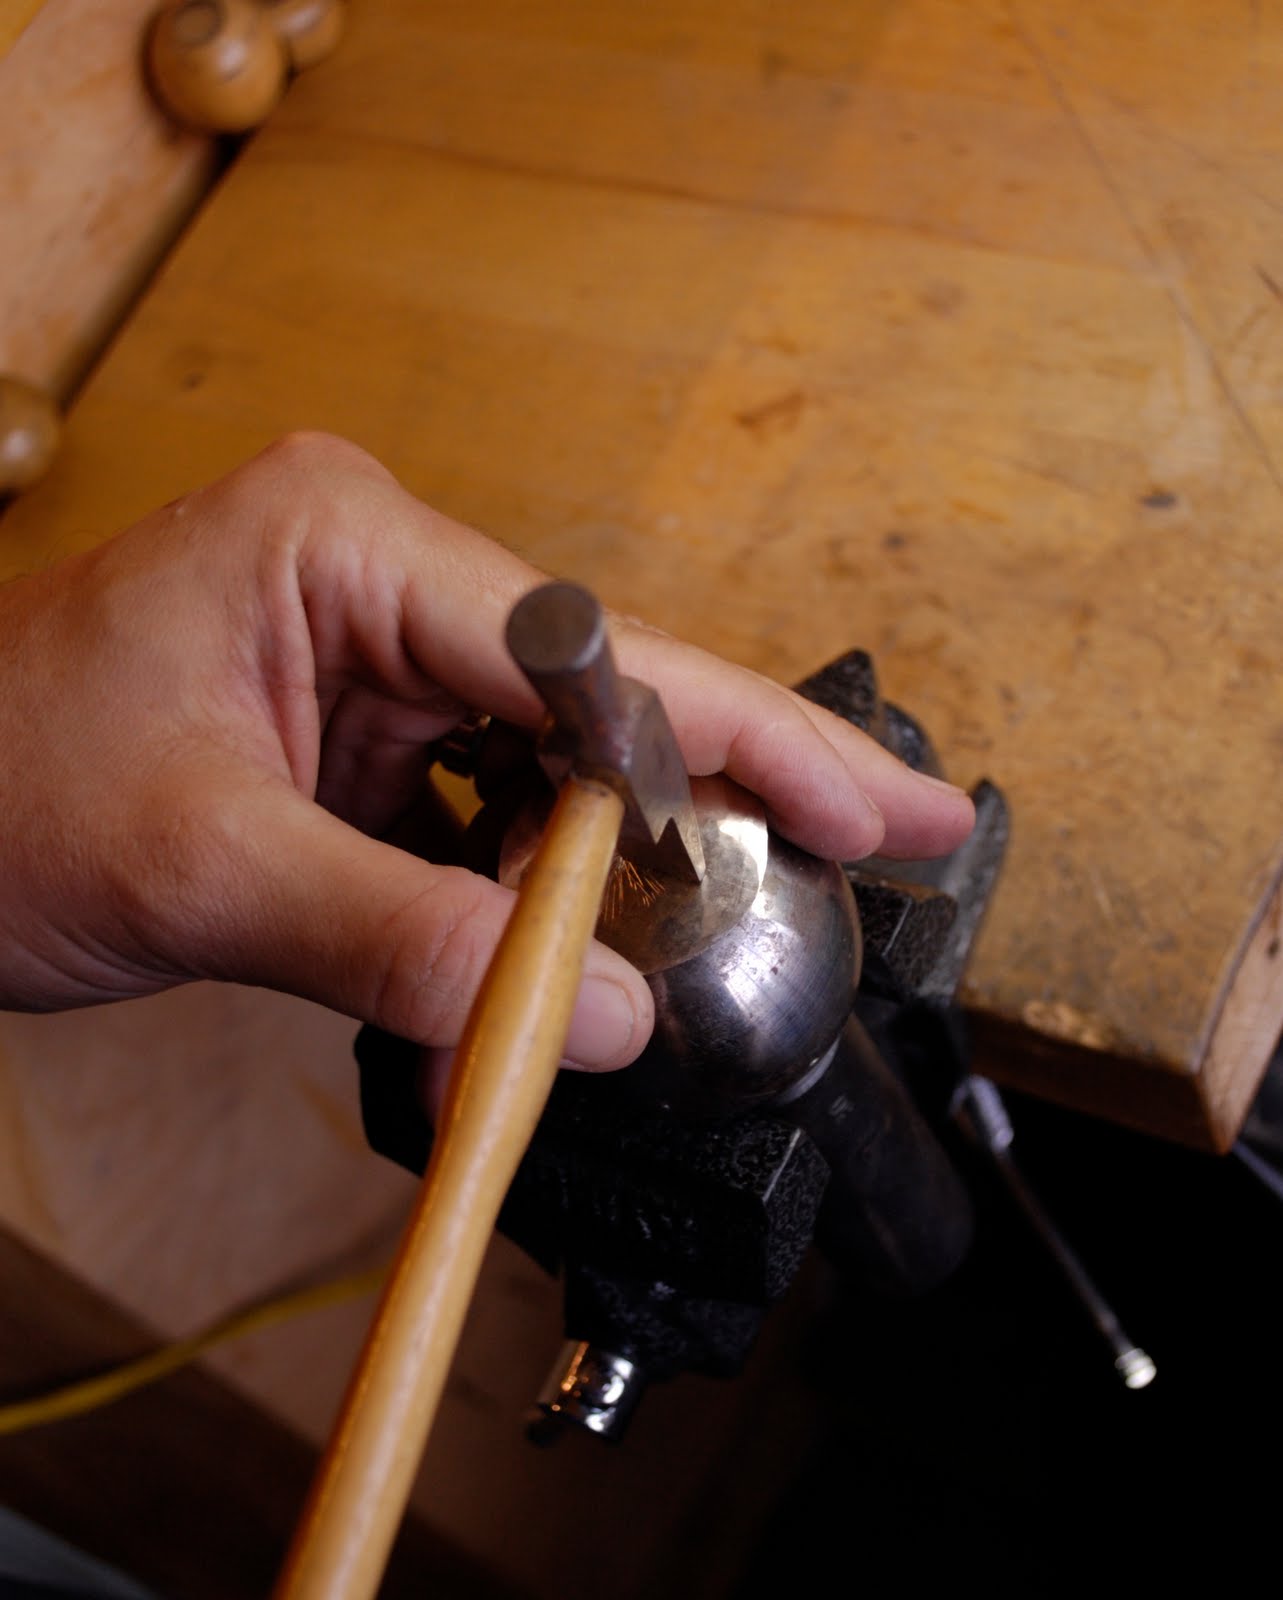
The sheet of 18k that I am working with is 40mm square and 1mm thick. How do you turn it into a pendant? First I use dividers to find the center of the sheet by scribing a line down the center in both directions. Where they intersect is the center of the sheet. I then use the dividers to scribe a circle.

I use a jewellers saw to carefully cut on the outside of the scribed line turning the square into a circle.

I dip the circle in a mixture of alcohol and Borasic acid to coat it and protect it from coming into contact with oxygen while heating. Yellow gold and platinum don't react when heated but white gold and Sterling silver need to be protected when heated or you get a black coating that appears on your metal.

I then use a propane torch to heat the disc.

This process is called annealing. The heat changes the microstructure of the metal when it reaches 1400 degrees F, or a glowing red. Yellow gold can be quenched in water to cool it but white gold can become brittle and crack if quenched too quickly.
The metal is now nice and soft and ready to hammer and shape into a low dome. I will them anneal the metal a second time before putting on the final hammer finish. There is nothing worse then having a piece crack on you from overworking it.
Next week we are on to hammering!

Saturday, August 7, 2010

18k pendant with diamonds

For project #2 I wanted to use a different method than casting to make something sparkly. So I thought it would be cool to do a bit of forging. I plan to use this hammer to turn...

This sheet of 18k white gold into...

This pendant! If I use the sharp end of the hammer and start at the center and rotate the piece as I hammer I should get a really nice pattern to come out. The hammering will also turn the flat sheet into a low dome, creating a really pleasant soft look and feel

Thursday, August 5, 2010

Finished project #1

All finished. I set the diamonds and had a couple of my neighbors here in the Distillery try it on to see how it looks and decided that it doesn't need hand engraving. It's modern, simple, elegant and too much ornamentation can sometime distract you from the form of the ring. It needs to be worn to get a real sense of the scale, it has presence, and strikes a nice balance between old world and new, I love it! 
I have bought the gold for my next project and my next post will have a concept sketch and a picture of the raw materials.

Friday, July 30, 2010

stone setting success!

Success! The stone is set. I used a grey wheel in the flexshaft to smooth out the marks left by the hammer and steel pusher. All that is left to do is the bright cut. I will use a graver to clean up the metal where it meets the stone, essentially cutting away any jagged bits that the hammering caused. Then it's on to the finishing touches. I am 100% sold on using some small diamonds to pave set on the sides of the ring, but I am about 50/50 on the hand engraving element that I was thinking of. I am not sure if it needs it. I think I will set the stones first and see how it looks.  Next week I will do the big reveal of the finished ring and also post a sketch of the next project. Very exciting!

Thursday, July 29, 2010

Setting the Aquamarine

We are down to the nerve wracking part of the project, make or break... as it were.
Stone setting is fairly straightforward. You create a "seat" for the stone and then you push, burnish or hammer metal down to cover the very edge of the stone and catch it in place. The trick is not to chip, scratch or shatter the stone when hammering on it. Aquamarine is a fairly tough stone and can take a fair bit of the force required to bezel set a cabochon. Here I am filing the edge of the bezel to make it easier to push over the stone.


I like my bezels to look really thick. This means that there is a lot of metal to move so the edge needs to be cut on an angle to help in the pushing. This is called a "chamfer" facet. I use my flexshaft and a cylinder burr to remove metal quickly.


I use a ball burr to remove the last bit of material at the edge.


I then put the stone in the seat and tack it with a dot of crazy glue to prevent it from jumping around when I am hammering on it, that's one sure way to crack a stone.


I use a pistol grip chasing hammer and a steel pusher to hammer the metal down onto the edge of the stone. Almost finished...